Jul 25, 2014 | Green Living
I had a few maternity shirts with those lovely belly stains on them…
in other words “not fit to donate or sell.”
Looking at the shirts I thought that there was a lot of nice, soft, material in a maternity t-shirt, and the backs of the shirts were perfectly fine
so I started searching for free patterns on Pinterest.
Now, I am not an expert at sewing so I wanted something very easy to get back in the swing of things.
Found this one for a baby Cap Sleeve Dress on Shwin & Shwin that was adorable and thought I’d give it a try.
 |
Cutting out Bodice from Maternity T’s
(was debating putting those molas on the dress) |
Aimee is 4 months old tomorrow, but large for her age. She’s about 15# and 29″ long so she’s wearing a 6 month size in most everything, even larger in some because of her height. This free pattern was a size 12-18 month, but looking at it I didn’t think it was that huge so I made it to size.
I used the backs of two maternity t shirts in the end, a teal green one and a purple one.
For the skirt I didn’t follow the pattern because it didn’t fit on any of the shirts right. I ended up taking the purple t shirt and just cutting off the bottom of it all the way around (about 10 inches long) and then gathering that and sewing it on the bodice.
My first attempt revealed that the bodice was way too long as well as the skirt, but width was fine.
 |
| “Mom, this is too big!” |
So, I cut the skirt off the bodice and cut length off of both, then resewed.
This was perfect. BUT, my stitching wasn’t very straight and seam showed on skirt…
SO
I used the binding that had been around the top of the teal v-neck t shirt and cut it off to make a belt of sorts. I stitched it on using a decorative stitch on my machine and black thread. I left the ends hanging like a real belt, and then made a fabric flower out of the purple fabric.
 |
| Floppy Flower and Belt Detail |
To make the flower I just cut the end of a sleeve off at about three inches
then folded it and sewed a basting stitch and gathered it into a rough flower. Then I stitched those stitches together on the back and hand stitched it on, gathering where I thought it needed it.
 |
| I think she likes it! |
It was really quite easy to work with jersey. I’d been scared to try but think making t-shirts for her would be so simple. I have several other dresses cut out from patterns I’m making myself, so I’ll keep you posted!
Jul 27, 2010 | Uncategorized
Sew strips that is…
I found a new fabric store while the kids were at dance last week…
Probably not a good thing.
This store has ONLY beautiful, adorable, marvelous fabric. They are tiny and know how to sew (unlike the chain stores I usually shop at.) They smock and have the most adorable baby girl dresses you’ve ever seen. Too bad my baby girl is a teenager!
I found it AFTER I’d made Jac’s nap-mat (which did end up very cute) but they had some even cooler material I could have used. (The one with the forest animals was too cute!)
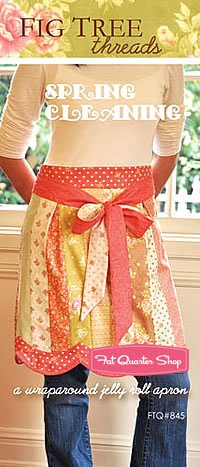
This is what I ended up with:
 |
| 1933 Vintage Material- Chloe’s Closet by Moda |
|
|
|
|
The material will make 5 aprons, so I’ll have enough for gifts.
I’m scared to start because I’ve never used a rotary cutter and was informed that
I was living in the dark ages. Wish me luck!
Jul 19, 2010 | Motherhood, Uncategorized
Today is the first day of school!
My 3rd, 8th, and Kindergartner
I spent all night making a nap mat cover for Mr. Jac.
I didn’t use a pattern, just sort of winged it from the nap mat my mom had made me in kindergarten (yeah, I still have it.) I put two stretchy circles of fabric on the end to tie it all up with, and Em made the pillow. I was happy to use the fancy star stitches my machine can do around the blanket. Fun!
All Rolled Up
Alien on the Blanket
All my kids are in school this year, and Cole and I don’t know what to do.
He wouldn’t stop barking when Jac was getting his clothes on like he was saying, “You can’t make HIM go too, it was bad enough when just the two big ones went!” My reluctant kindergartner was fine until I said “bye” in the classroom. I haven’t had a call yet, so wish us luck.
The house is too quiet.
Jul 12, 2010 | Uncategorized
the “recipe” for these Fourth of July T-shirts I made for the kids…
Kids on Navy Pier for the 4th!
- I bought 3 t-shirts at the hobby store for $2 each.
- Looked for a striped or starred t-shirt in my give-aways but didn’t have one, so went to the thrift shop and got a t-shirt with both for $2.
3. I printed a star template (just did search for a star image) and printed it out, then cut them out of the paper. I transferred these to some sticky iron-on paper I had, but didn’t iron them on, just used it like a sticker to place them on the shirt.
4. Turn shirt inside out and position star however you like. Pin in place. I kept paper on the star, it was sort of like freezer paper (I’m sure there is a better way but this worked for me on my first try.)
5. I used a straight stitch to sew them on. (Be careful on points of stars. Make sure to keep needle in fabric while turning. I didn’t know this at first and some stars were messy.) Tie off ends of fabric in knots to prevent from coming out.
6. Turn shirt right side out and with embroidery or small scissors carefully cut through first layer of fabric so that material on back shows through.
It was pretty easy, but not I’m not as skilled on my machine as I’d like yet. I want to keep making some of these to see if I get better! The test was in the washing, and they did wash well! YAY!
Apr 3, 2010 | Uncategorized
I saw some adorable flip-flops at Target for $13.
(Sorry, but there is NO WAY I’ll spend that much on a pair of flip-flops.)
They were really cute though, and instead of plastic between the toes (I honestly hate ANYTHING between my toes, except sand) they had straps made from satin.
I wanted to make some cheap beach shoes for our Cape San Blas trip,
At the dollar store I found some flip-flops for the kids for $1. (You could use some you already own also, but we had none.)
Also found a pack of bandannas (2 for $1)
and a crazy tie for (yes) $1
You could use any old scraps of fabric you have too.
Grand total on my son’s flip-flops (or chancletas as we say in Panamá.)
I cut the plastic straps out of the bottom of the shoe. I saved this to use as a measurement for
the straps I made.
I cut strips from the bandanna about 1/2 or so wide. (You could use any width you wanted but this was for my 5 yr old.) I took three of the strips and braided them together into a stronger strap.
Using the Y strap I cut out I constructed a similar one out of the braided straps by taking two braids and knotting them right where the two met. I wasn’t sure what to do under the shoe, but ended up just knotting it once under and cutting pretty close to the bottom.
It worked!
(Sorry the quality on the picture is so bad. I took it with my phone, and for some reason my phone won’t upload my pics! I had to email it to myself to get it off the dumb iphone…)
They lasted, which was what I was worried about, and even in the water on the beach.
I’m going to make my daughter some from the old tie, and will post pics if they are cute!